Monday 18 May 2009

CAPA fixes everything!


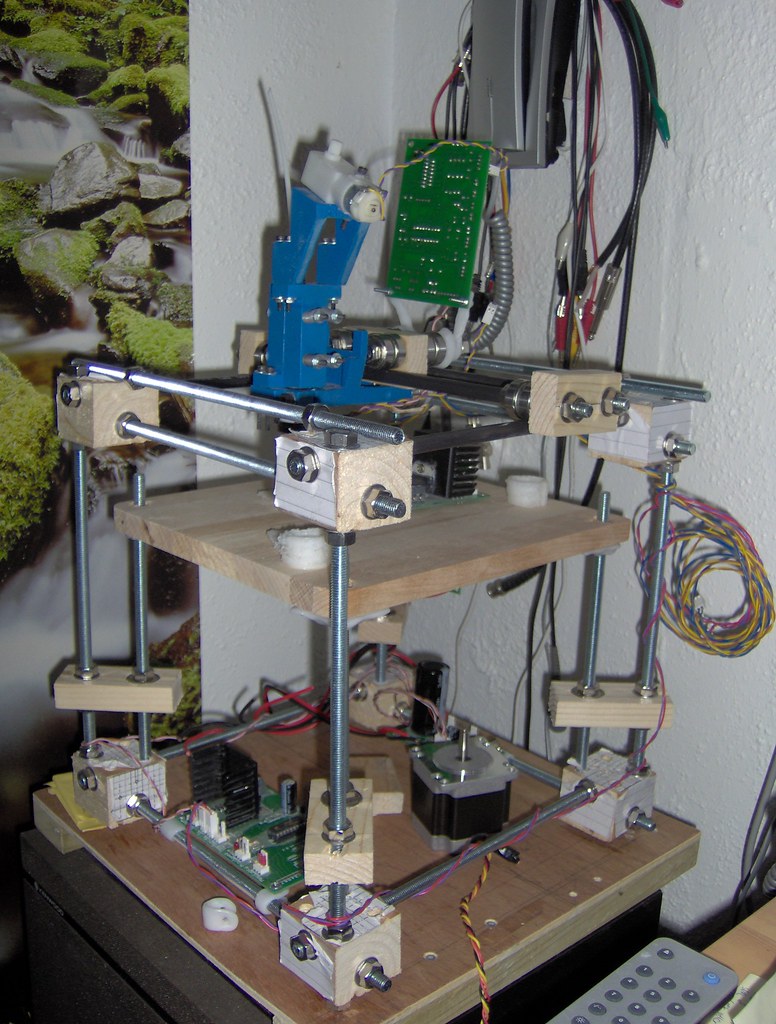
I've made a bit more progress with my mini Darwin. I now have an X axis with the extruder mounted on it, as well as a more or less complete Z axis. When pushing the extruder around it moves very smoothly, and with very little force so I'm hoping to get some pretty decent print speeds and much better quality than my Lego RepStrap. My idea with this RepStrap is to put in the least amount of required effort to get the thing of the ground, I'm not really designing the thing to last. Then once it is printing I can replace the lower quality pieces with new printed parts!


A quick note about drills
I did not use a pillar drill for my corner blocks, I just used an electric hand drill and a set square. The holes are more or less straight but the imperfections have caused me a lot of problems. My machine is actually a parallelogram rather than a square, but as long the the axis slide rods are parallel then this does not matter too much. I would advise anyone without a pillar drill to try and find one they can use, as the time you spend finding one will be much less that the amount of time you will spend trying the get everything straight afterwards!


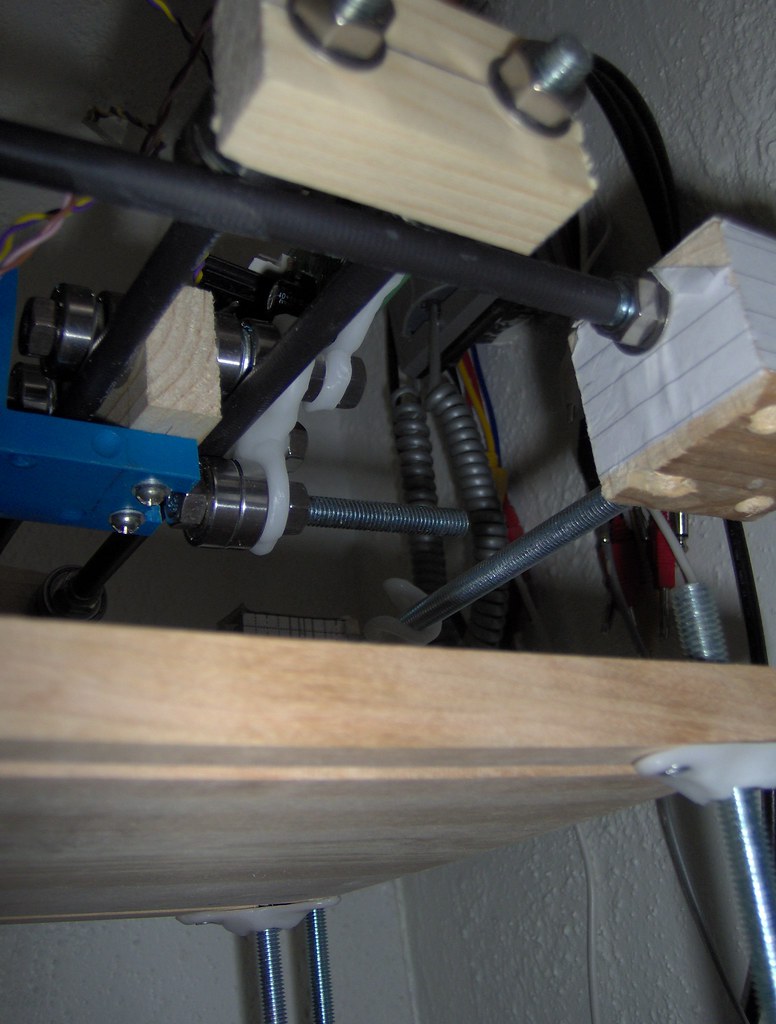
I had not realised how much the extruder would overhang on the X axis, so my idea of having a X carriage just using skate bearings on top was not going to work. A bit of CAPA moulding later and I had a nice part that holds a third bearing underneath the carriage, rolling along the underside of the steel rod. The piece was bent a little before it set so that it is sprung firmly against the rod (CAPA is very 'springy') keeping the X carriage very firmly against the rod.


I made these CAPA brackets to hold the nuts and used just two screws in each of them to allow a little play, but only when tensioned against the twisting of the CAPA.


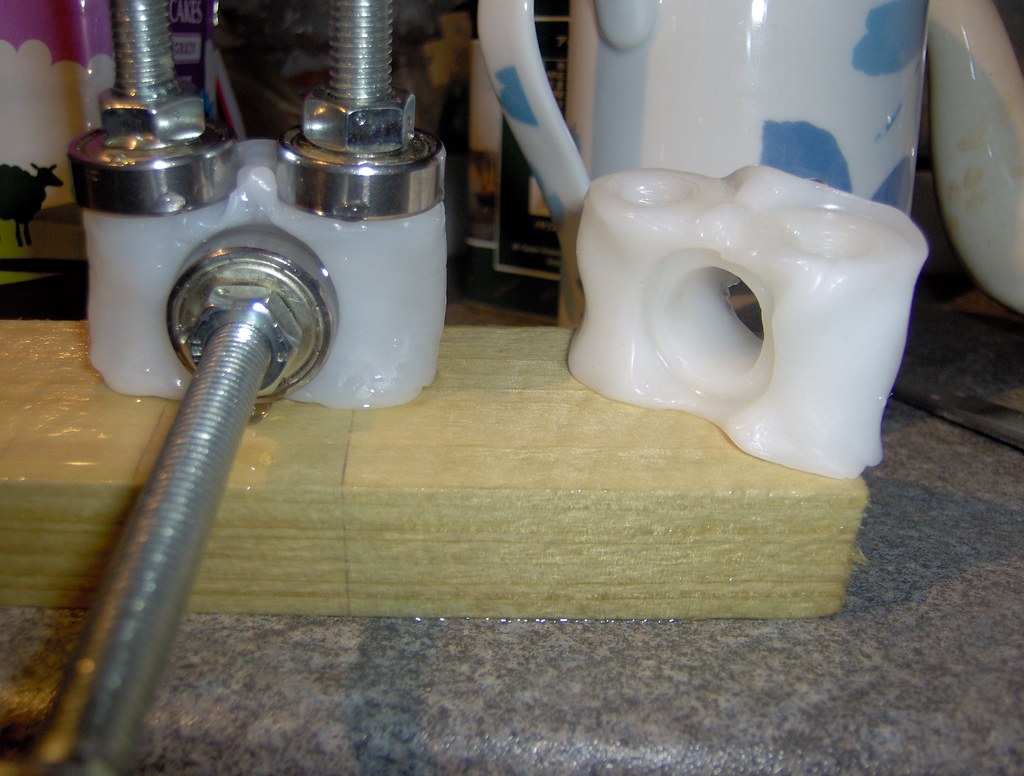
Building a jig first makes making parts from CAPA much easier. These are bearing blocks for the Y axis using 608 skate bearings. They may not look precise, but the three holes are, and that is all that matters :)

Now I'm just waiting for my gears and chain to arrive, but in the meantime I can still make my X, Y & Z motor mounts. Time for some more CAPA I think.

Monday 11 May 2009

Gears and chain

I have decided to use this chain with these gears,

I will use the 15mm gears for the X and Y axes and the 40mm ones for the Z axis. For my mini Darwin I will need: Y axis - 510mm x 2; X axis - 564mm; Z axis - 972mm. This gives a total of 2556mm so I will need to order 3m.


This works out quite extensive at £30.25 for all the chain and gears but I will have plenty of gears left over (they come in a large pack) and will be happy to send any to anyone in the UK who wants any.

The motors I have are 200 steps per revolution, using a 15mm gear the axis will move 47.115mm per revolution. This gives an axis resolution of 0.24mm which I will be perfectly happy with.

Sunday 10 May 2009

Mini Darwin

I received my 20 300mm threaded steel rods with lots of nuts and washers so I set about making some corner brackets to hold them all together. I don't have a pillar drill so I just had to drill holes with an electric hand drill and a set square. This worked reasonable well but the holes were very rarely at perfect right angles. To 'fix' this I used a reamer to enlarge the holes, allowing the steel rods to line up straightly. This would not work in the standard Darwin design using un-threaded rods and grub screws. However with this design it does not matter if the hole is a bit bigger, as long as the blocks themselves have right angle sides then the rods will line up when the nuts and washers are tightened. While not elegant, it works.

A mitre box is essential

I also used soft wood, again because of the threaded rods, the blocks become stronger when they are assembled.


Four blocks ready for drilling


The assembled frame

The Y axis moves very nicely on the shrink-wrap covered threaded rod. Next I need to get some chain or belt, and make the Z axis and print table.

I think 300mm rods may have been a little small and will give a very small [but usable] print area. I probably would have been able to get away with some smaller motors too as the skate bearing axes require very little force to move.

Thursday 7 May 2009

Spanner Spin


ultimate stepper testing - stepper motor spins spanner!

New Motors

Today I tried out my new motors from eBay

Up until now I have been using a hacked around firmware in which I had changed the coil sequence to give greater torque when using tin-can unipolar stepper motors (by ensuring two coils were always powered at any given moment). Now I'm using some proper bipolar motors so I dug out my old JDM PIC programmer and flashed the chips with the last standard firmware.

I wired the motor coils up in series to give a coil resistance of 12.4Ohms per phase and a maximum current of 970mA. Well within the capabilities of the driver IC. The 'Rated Voltage' in the datasheet works out at setting the PWM duty to around 72% but the motors seem to run happily full power without getting hot.

At full power I can run the motor at up to 240 (PIC speed byte) with no load before the motor starts missing steps, and at 72% power up to 235

I haven't tested them for real on a machine but so far I am very impressed with these motors as they cost only £9.26 each when buying four + £11.97 postage

I tested all of this from a Python console:

import reprap
reprap.openSerial('/dev/ttyUSB0', 19200, 60)
reprap.cartesian.x.active = True
reprap.cartesian.setPower(72)
reprap.cartesian.x.forward(235)

Wednesday 6 May 2009

No more Lego RepStrap

I've decided to call it a day with my Lego based RepStrap (but not on making a RepStrap). It has been interesting to experiment with but I ran into too many problems and have decided that a more substantial steel-based solution is in order. The machine has been sitting there for a few months not doing anything now, this is the short story of my change in direction over the last few days after being inspired by some recent blog posts.


My decomissioned Lego RepStrap


The best model it ever produced


First I decided to give up on screw driven axes as they are very so slow to move and make printing painfully slow. With this in mind I ordered some new more powerful motors to drive the axes directly. I received my new stepper motors today. I got four NEMA 23s from Astrosyn for £49 including postage.

New motors!

They are not the most amazing spec motors but I think they should be perfectly sufficient.

I also bought some 608 skate bearings the other day with the intention of using them to make a new Z axis for my Lego RepStrap. I started playing around with them, and tried bolting two up close together like James did here and running it along another [threaded] steel rod. I was impressed that it even ran pretty smoothly even along a threaded rod. I then tired covering a rod in heat-shrink plastic to make it even smoother.


This gave a very smooth run, and also moved incredibly silently due to the dampening from the thin layer of heat-shrink plastic. A quiet machine is an important goal of mine [this is why I also plan to move to a stepper driven pinch-wheel extruder].

At this point I became decided that abandoning my Lego RepStrap was in order and started looking around for other parts.

I saw the post Ikea Design and remembered that I had seen the very same chain and gears available from Rapid Electronics.

I found a company selling M8 300mm threaded steel rods on eBay for £3.37 for five + postage and was unable to resist the temptation of nicely pre-cut rods. I ordered 20 M8 300mm rods today and a whole load of nuts and washers.

My plan now is to make some corner pieces from wood and construct the steel frame, then put the motors, gears and chain on. The four rods that have skate-bearing runners sliding along them will be covered in heat-shrink plastic.

Quick sketch of my new design

I am also thinking of trying and modify my generation one PIC electronics to run a stepper driven pinch-wheel extruder.

First Post


This is not really my shed

Ok in my current house I don't actually have a shed, but if I did have one I would be using it. I used to have a good shed in my last house but decided that choosing a place to rent on the quality of the shed is probably not the best idea.